Phi-menu
Welcome to the Phi-menu page!
After thousands lines of code and 25 pages of documentation, I eventually decided to make my first and last release of this package. Its replacement is the phi_prompt, packaged nicely in a library.
Make an interactive program on Arduino with ease!
Open-source software for Arduino and Phi shields.


This following is what your project will look like with the phi-menu. I spend very little time with the interactive menu but concentrated on my actual project, since the phi-menu system takes over all the work. The details of this project is in the example section.
1. Introduction
The phi-menu is an LCD keypad interactive software. It provides a light-weight template for programming the multi-function Phi shields. It provides three different types of customizable LCD menus (see picture at the beginning) together with functions using the LCD and keypad to collect user inputs such as strings, numbers, Y/N, month, day of the week, time, even Morse code. You can easily develop your own interactive project on Arduino and Phi shields without having to deal with the hassle to either hodgepodge codes from various online authors or write the codes yourself the hard way. From the very start, your project looks like a million dollars.
2. Documentation and download
Here is the documentation updated on 03/12/2011. It contains all details of the structure of the software and its functions with one example, making a car reverse obstacle sensor, featured on instructables.com
->Click here to download Phi-menu 20110312<-
->Click here to download Phi-menu 20110312 with demo<-
3. Detailed step-by-step example
This is an example that displays “animation” on a character LCD. We want to make an regular character LCD display an couple of animated arrows.
We need three menu items:
1. Display the animated arts
2. Set parameters, such as speed of the animation, forward or backward, and which animation to play
3. Display credits.
First, take a quick look at the FUNCTIONS.pde
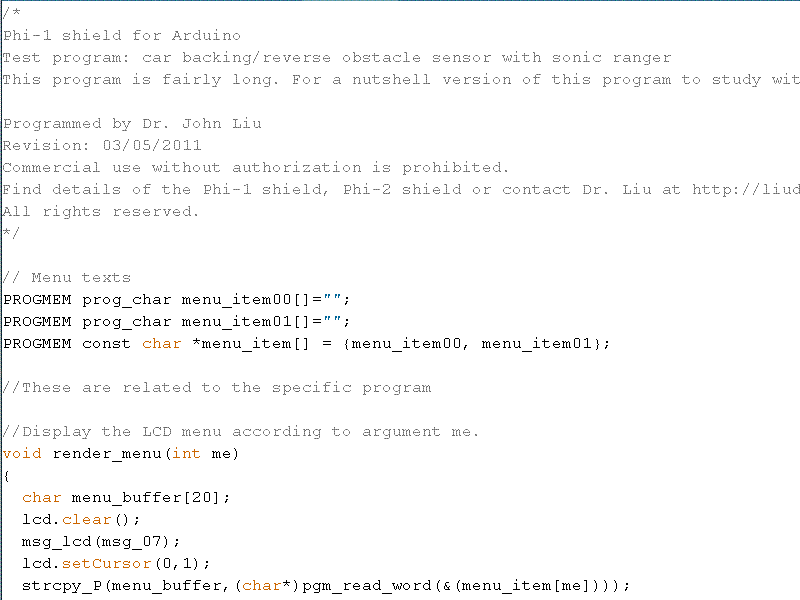
Then add your menu texts in the menu_item00 and menu_item01 strings (in red) and add more menu items as you need (in green) . Make sure you enumerate all these strings in the later array (in green).

Now define some variables that you will be using in your program here after the comment line (in green).

Scroll down in FUNCTIONS.pde and find the switch command. Make sure you add additional menu items in the function (in green).

We code the parameters function first. We have three parameters, delays, art_number, and _forward. In parameters function (menu_function_0), we need to ask user to adjust each parameter at a time. You first prompt the user with a string such as “Delays” (in red) so the user knows what he is adjusting. Then you assign the value of the parameter, such as “delays”, to a temporary variable para_val (in purple). This way if the user changes the value and decides to escape, the original value of delays is not disturbed. Then invoke the hmi function. It handles everything, displays the current value of the parameter, sets the up and down keys to change the value, with lower and upper limits, and step size per key press. Once the user is happy with the value, it returns. Details of how to use the hmi function is in the documentation.
The last line in the block updates the parameter only if the user presses confirm. If the user actually escapes, the parameter is not changed.

In the body of the FUNCTIONS.pde, you will define menu_function_1. such as the following image:

In the body of the FUNCTIONS.pde, you will define menu_function_2. such as the following image:

Source code:
Character art with Phi-menu for Phi-1 shield
4. More examples
- Animated characters on LCD You have a few animated arrows and adjust speed and direction of animation. Full code, nutshell
- Password input panel You demand password from the user before you show them top secrets! Full code, nutshell
5. Future improvements
I plan to improve the phi-menu in the following areas:
- Turn the codes into class and encapsulate all variables and functions
- Add multiline message stroll display function support to display longer messages on a 16*2 or larger character display.
- Port the code to work on KS0108-compatible 128*64 dot matrix displays
- Add btn_null and update buttons class to define null button. It will do nothing and stays off. This saves one from deleting buttons objects and sensing codes to free the pin that is shared with a button.
6. The legal stuff
Let’s keep this short. The software is defined as any part of the complete collection of the code of the phi-menu system. There is no explicit or implicit warranty that the software will work. You are free to modify and redistribute the software as long as the credit section is kept. You can add your own credit and modify the summary of the functions.
You are not allowed to use the software for commercial purposes, which include but not limited to selling the software or its modified versions for money directly or selling hardware with the software attached for “free”. The software is meant to be shared among interested individuals and educational institutions.
If you like to use the software with your products, commercial licenses can be obtained by contacting the author at http://liudr.wordpress.com
Pingback: Arduino character art on LCD « Liudr's Blog
Pingback: Password panel « Liudr's Blog
Pingback: Big font « Liudr's Blog
Pingback: Phi-menu is about to be released! « Liudr's Blog
Hi,
first of all thankyou for your great job!
I’m using your library to build my automated homebrewing system…
I have a question, there’s a way to “bind” a button to the return() funcion?
I’m using 4 buttons mode, and the problem is tha I have “A” and “B” buttons that act as Enter key.
Thank you for your help.
So are you using the Phi-menu library or the more recent version the phi_prompt? I have discontinued support to Phi-menu since I rewrote the library and added more functions to it and I named it phi_prompt, since the library handles more than just menus.
Post some of your code so I can see what you’ve done so far.
Arghhh very sorry, I’ve posted in the wrong place…
I’m using the phi_prompt library…
I’m working on your sample sketch (menu 16×2) and I’ve 4 pushbuttons connected to 4 digital pins;
what I’m looking for, is to have these buttons working as up – down – ok -esc but they are working as up – down – ok – ok…
Thank you for your time
In the 4-button mode, the following buttons are used, up, down, enter, and escape
Here are the code that defined the 4-button mode:
#ifdef use_4_btn
phi_buttons btn_1(btn_u, LOW);
phi_buttons btn_2(btn_d, LOW);
phi_buttons btn_3(btn_null, LOW);
phi_buttons btn_4(btn_null, LOW);
phi_buttons btn_5(btn_b, LOW);
phi_buttons btn_6(btn_a, LOW);
#endif
So if two keys are both acting as ok, is it possible that btn_b and btn_a are defined as the same digital pin by mistake?
Example of right definition:
#define btn_b 14
#define btn_a 15
Example of possible wrong definition:
#define btn_b 14
#define btn_a 14
Can you provide code on how you defined your buttons?
sure, this is my code:
//Phi-2 shield buttons and channel pin assignments
#define buzzer 16
#define btn_u 13
#define btn_d 12
#define btn_l 5
#define btn_r 4
#define btn_b 11
#define btn_a 10
//Phi-2 shield LCD pin setting
#define LCD_RS 8
#define LCD_EN 9
#define LCD_D4 4
#define LCD_D5 5
#define LCD_D6 6
#define LCD_D7 7
#define use_4_btn
#ifdef use_4_btn
phi_buttons btn_1(btn_u, HIGH);
phi_buttons btn_2(btn_d, HIGH);
phi_buttons btn_3(btn_null, HIGH);//
phi_buttons btn_4(btn_null, HIGH);//
phi_buttons btn_5(btn_b, HIGH);
phi_buttons btn_6(btn_a, HIGH);
#endif
Thanks
Umberto
Umberto,
So you are defining the phi_buttons with HIGH parameter. This means you need an external pull-down resistor for the HIGH logic. Could you confirm that you are doing that? Most of the times, people just connect an arduino pin to one side of a button and then gnd to the other side and use the LOW parameter so that the arduino internal pull-up resistor is used to save a resistor. I think your code has no problem but the escape button may have the effect like the enter if you don’t process the return value of a phi_prompt library call. Say you use the select_list to show a list or menu and then move to one item and press the escape, then the current item is the one you last highlighted and the return value of select_list() is -1. So if you want to tell whether the user pressed escape or enter, you can do:
byte ret_val=select_list(&myListInput);
if (ret_value==1) do_enter();
else if (ret_value==-1) do_escape();
The way you can tell which key is pressed.
thank you for the infos, I’m using buttons in HIGH only because I’had this mounted before for another project…
what I’m doing is working on your sample sketch (phi_prompt_16X2)
simply modifying the menu entry labels and functions (not the structure).
I’m not using the select_list (I think).
look this piece of code; I have to use a menu entry with “return” to go up, I will be happy if I can do this only pressing a button.
Thanks a lot.
// Menu texts
PROGMEM prog_char top_menu_item00[]=”Vis. Dati processo”; // Display durante la cotta
PROGMEM prog_char top_menu_item01[]=”Impostazioni Ricetta”; // Sottomenu per impostazioni steps
PROGMEM prog_char top_menu_item02[]=”File management”; // BOh… per ora lo lascio magari per i logs
PROGMEM prog_char top_menu_item03[]=”Start/Stop Processo”; // Avvia o ferma
PROGMEM prog_char top_menu_item04[]=”Info Sistema”; // Mostra I credits
PROGMEM const char *top_menu_items[] = {
top_menu_item00, top_menu_item01, top_menu_item02, top_menu_item03, top_menu_item04};
void sub_menu_set_cotta() // This is the sub_menu_1
{
int menu_pointer_1=0;
phi_prompt_struct myMenu; // This structure stores the sub menu.
// Initialize the top menu
myMenu.ptr.list=(char**)&sub_menu_1_items; // Assign the list to the pointer
myMenu.low.i=0; // Default item highlighted on the list
myMenu.high.i=5; // numero elementi del menu -1
myMenu.width=lcd_columns-((global_style&phi_prompt_arrow_dot)!=0)-((global_style&phi_prompt_scroll_bar)!=0); // Auto fit the size of the list to the screen. Length in characters of the longest list item.
myMenu.step.c_arr[0]=lcd_rows-1; // rows to auto fit entire screen
myMenu.step.c_arr[1]=1; // one col list
myMenu.step.c_arr[2]=0; // y for additional feature such as an index
myMenu.step.c_arr[3]=lcd_columns-4; // x for additional feature such as an index
myMenu.col=0; // Display prompt at column 0
myMenu.row=1; // Display prompt at row 1
myMenu.option=global_style;
while(1)
{
lcd.clear(); // Refresh menu if a button has been pushed
center_text(“Setup Cotta”);
myMenu.option=global_style; // This makes sure the change of menu style is updated if there is a menu style option in this level of menu.
myMenu.width=lcd_columns-((global_style&phi_prompt_arrow_dot)!=0)-((global_style&phi_prompt_scroll_bar)!=0); // Auto fit the size of the list to the screen. Length in characters of the longest list item.
select_list(&myMenu);
menu_pointer_1=myMenu.low.i;
switch (menu_pointer_1)
{
case 0:
//submenu inserimento parametri step
//sub_menu_1_function_1();
step_menu(1);
break;
case 1:
//submenu inserimento parametri step
step_menu(2);
break;
case 2:
//submenu inserimento parametri step
step_menu(3);
break;
case 3:
//submenu inserimento parametri step
step_menu(4);
break;
case 4:
//submenu inserimento parametri step
step_menu(5);
break;
case 5:
//
return; // This returns to previous menu level. Only sub menus should have this unless the top level menu also returns.
break;
default:
break;
}
}
}
GREAT!
I’m done….
I’ve used your code and now I’ve the 4th button acting as “escape”…
Again thank you for the help !!!
Awesome! I didn’t have much time last weekend to look at your code. I’m glad you worked it out!
BTW,
I have designed quite a few pieces of hardware, in case you’re interseted, here is a link:
http://liudr.wordpress.com/buy/
I saw your shields, unfortunately I bought mine before knowing you…
but for my next project I’ll surely give a chance.
Thanks again!
Hi liudr
I have a Arduino Uno and Ide Arduino 1.0.6
I downloaded the Phi-menu_20110312 (http://www.mediafire.com/?d60507ac0g3sqa7)
When I verify I get the following message :
What am I doing wrong ?
In file included from phi_buttons.cpp:18:
phi_buttons.h:41: error: ‘byte’ does not name a type
phi_buttons.h:42: error: ‘byte’ does not name a type
phi_buttons.h:43: error: ‘byte’ does not name a type
phi_buttons.h:44: error: ‘byte’ does not name a type
phi_buttons.h:45: error: ‘boolean’ does not name a type
phi_buttons.h:48: error: ‘byte’ does not name a type
phi_buttons.h:54: error: expected `)’ before ‘p’
phi_buttons.h:55: error: expected `)’ before ‘p’
phi_buttons.cpp:21: error: expected `)’ before ‘p’
Thanks for help
Erhan,
I have stopped supporting phi-menu a long time ago. The past few years I’ve been supporting the phi_prompt libraries that can do a lot more than phi-meun.
http://liudr.wordpress.com/libraries/phi_prompt/
It is compatible with arduino 1.0
Any plans for an oled menu system
Phi-menu is obsolete. Use phi_prompt, which is a newer version. If you change all the LiquidCrystal references in the library to your OLED library’s display object reference, you should be good to go. No other changes are needed.
I’m working on updating it and its examples a bit and release a version that uses I2C lcd backpacks since they are so popular.